How to configure lighting
Before you begin
Make sure the facility has:
- a local control node and lighting equipment;
- active growing cycles and tech sheets with a current photoperiod;
- day and night settings;
- a primary natural-light data source;
- roof, illuminated-area, and luminaire parameters.
The configuration applies to the entire facility. If required equipment, a data source, or Safety is not ready, the corresponding checkpoint remains incomplete and the configuration cannot be applied.
1. Select the facility and check readiness
- Open Lighting.
- Select the required facility.
- Check the control node, equipment, data source, and day and night checkpoints.
- Complete all required checkpoints before applying the configuration.
2. Configure day, night, and photoperiod
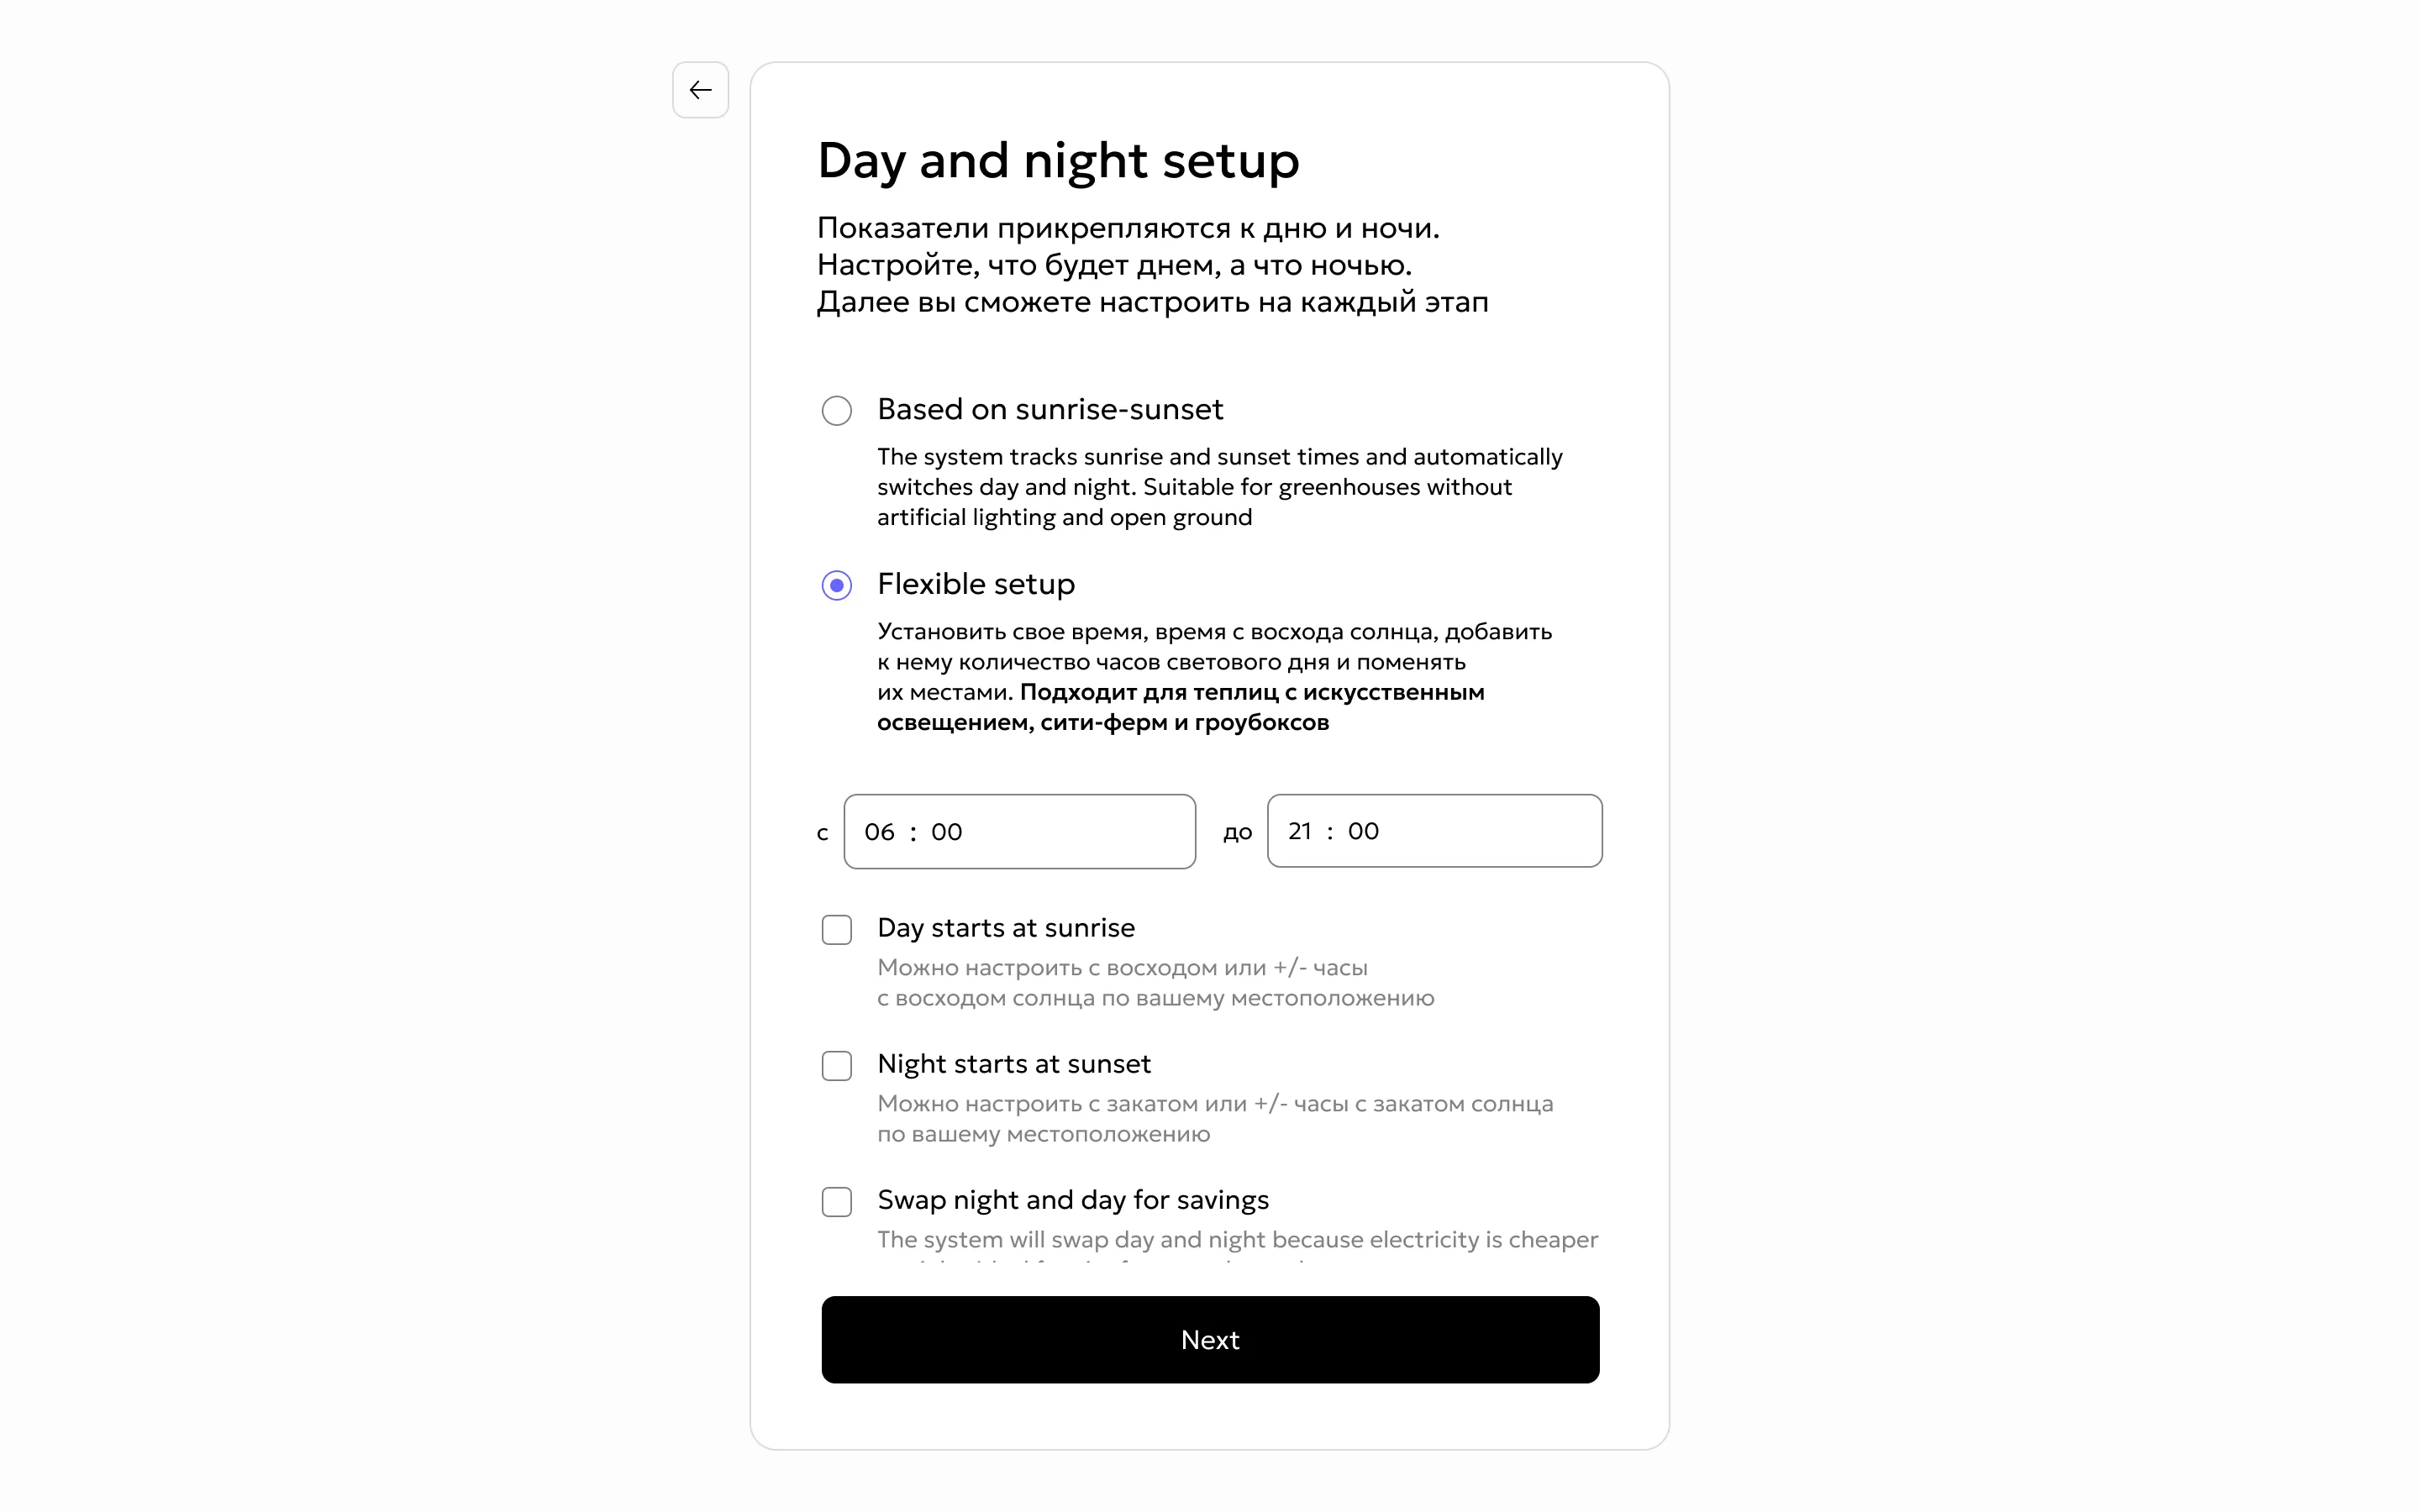
- Open Day and night control.
- For schedule, PPFD, or instantaneous irradiance, select flexible day and night settings.
- For radiation sum, use either flexible settings or sunrise and sunset mode.
- Check the photoperiod calculated from active cycles in the current facility.
- If automation requires another value, enable manual photoperiod adjustment and enter the required duration.
Cycles without a specified photoperiod do not reduce the calculated average. When manually changed, the new value is used only by the lighting configuration.
3. Complete the shared lighting settings
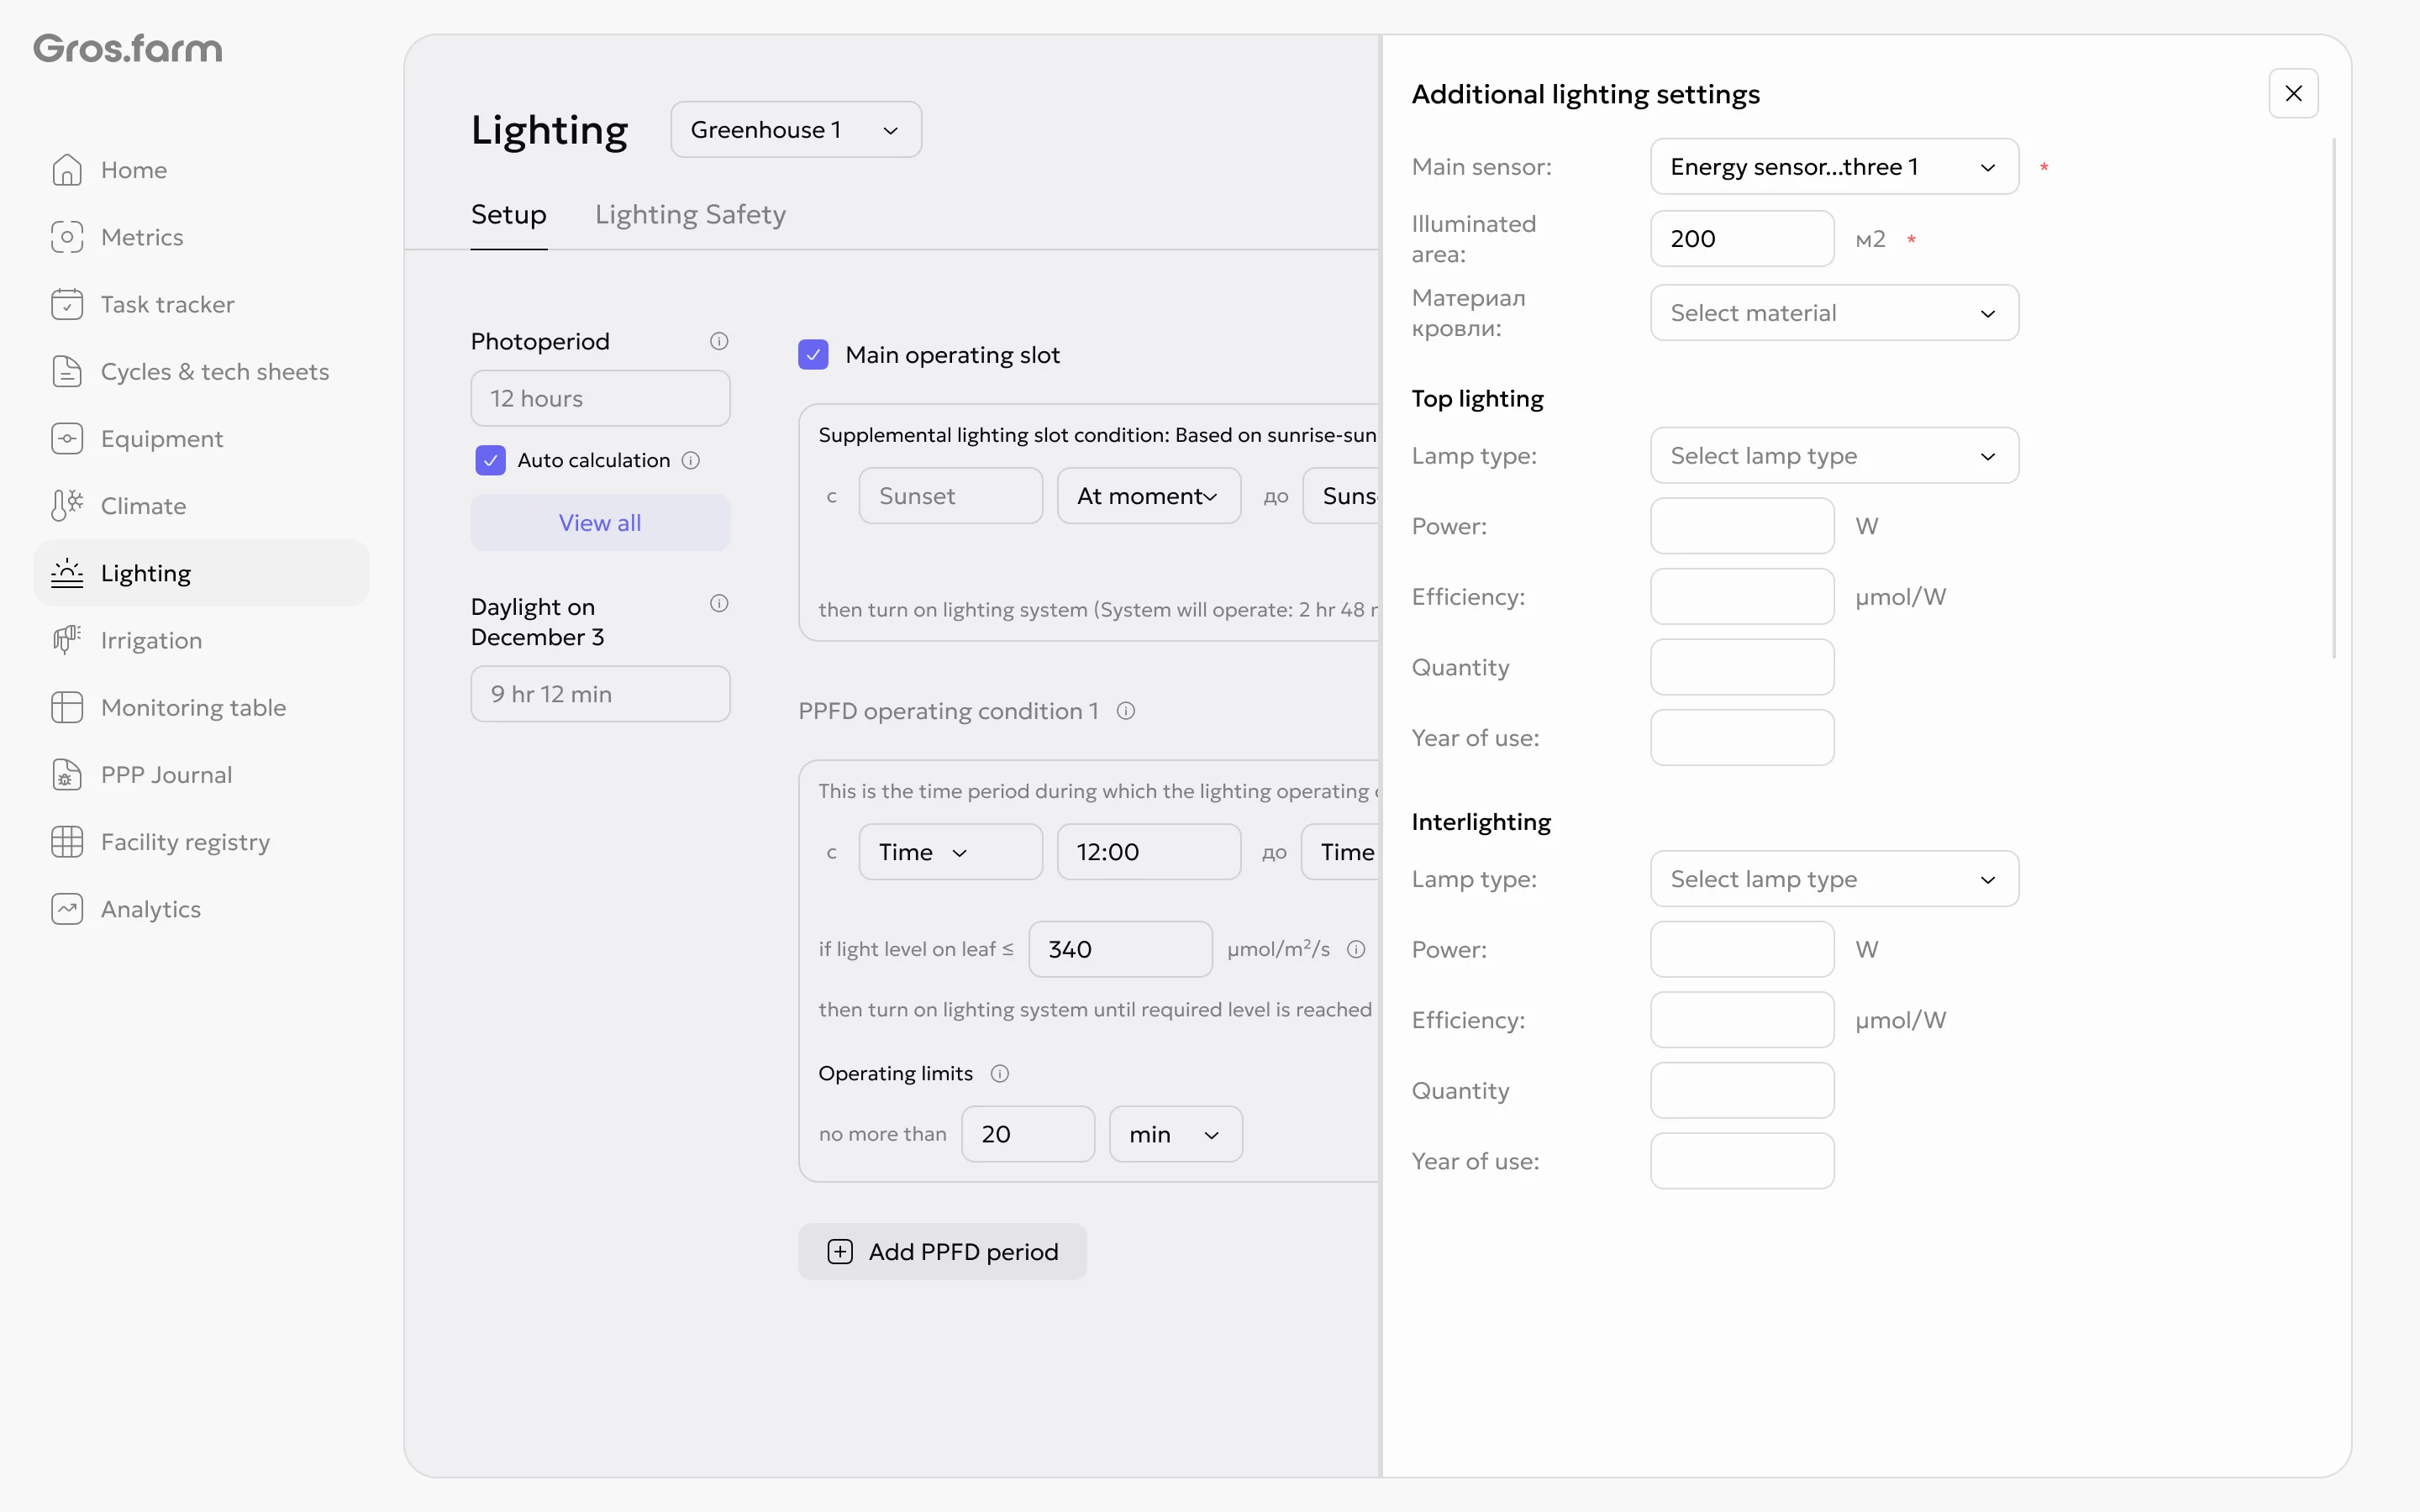
- Open Additional lighting settings.
- Select the Primary sensor: an irradiance sensor, a leaf-level PAR sensor, or a weather service.
- Specify the roof material and check the light-transmission coefficient. If necessary, enter a custom coefficient.
- Enter the facility’s total illuminated area.
- Enter the power, quantity, and service life of the top and inter-row luminaires included in the calculation.
- Save the additional settings.
If the primary source stops providing data, Gros.farm does not automatically replace it with another source. PPFD and irradiance conditions that require this data do not run until the source is restored or the setting is changed.
4. Select and configure a mode
Schedule
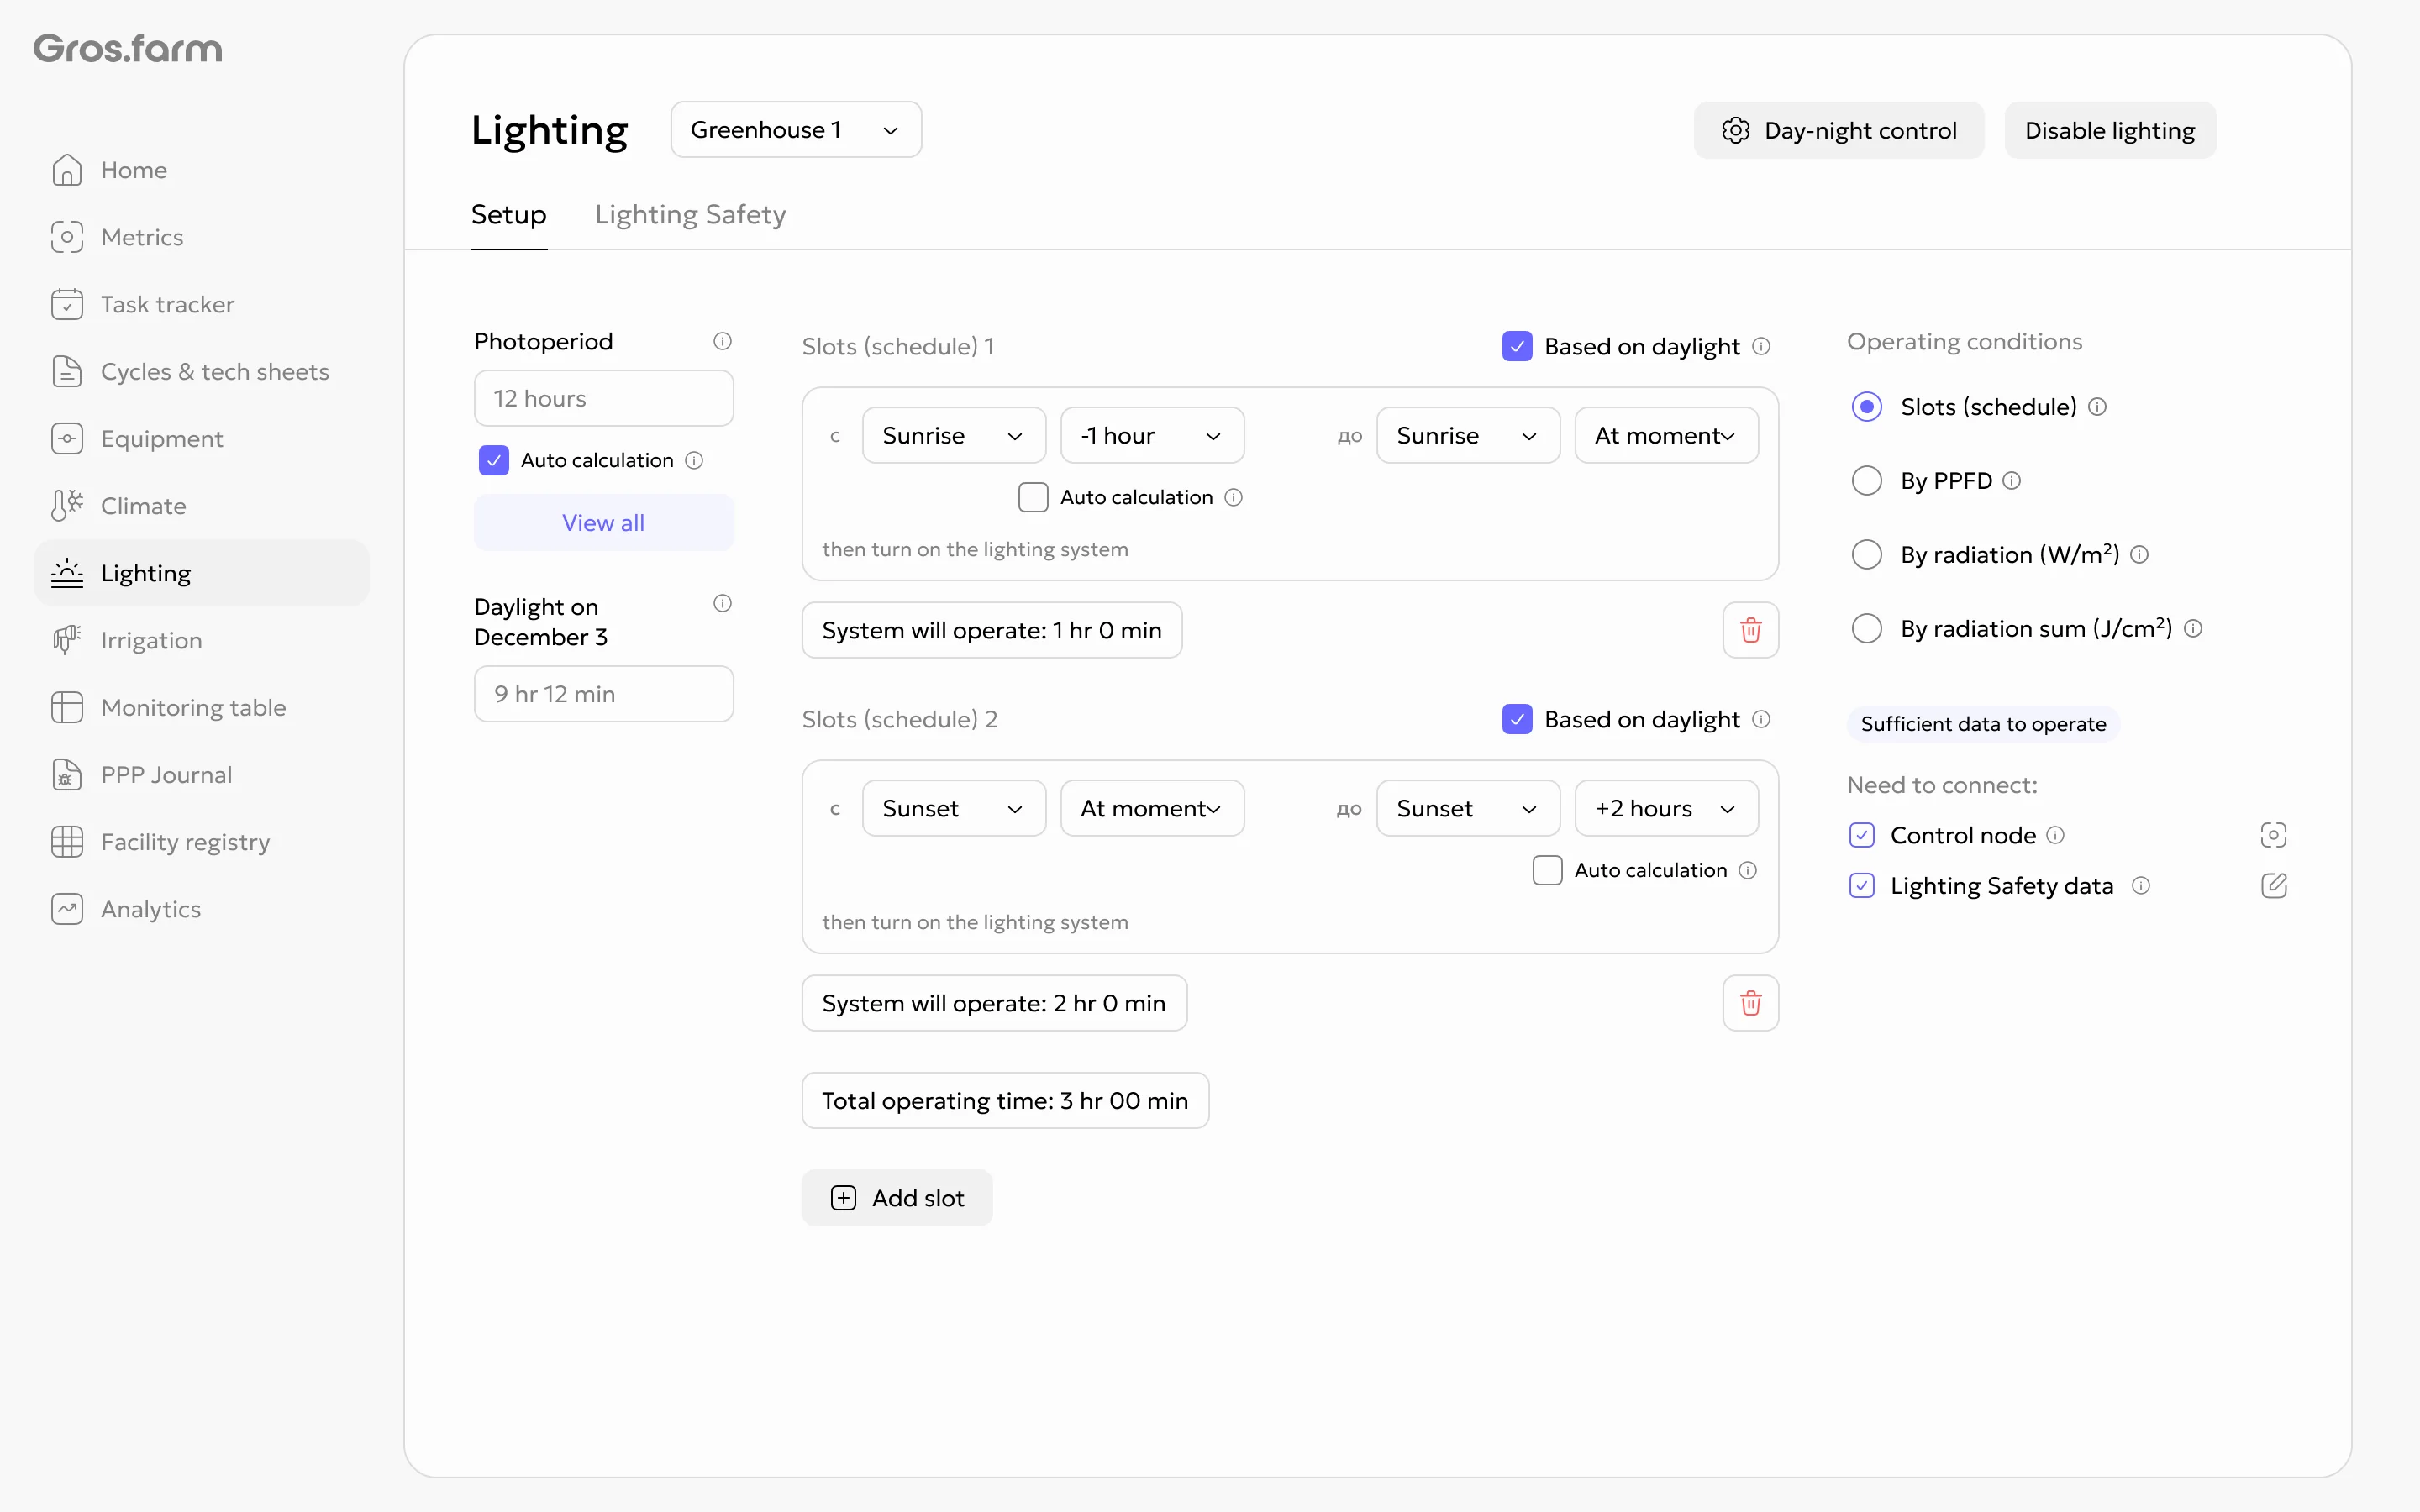
- Select Slots (schedule).
- Add the main lighting slot.
- To compensate for a photoperiod deficit, enable the day and night based setting and use automatic calculation if required.
- To run at specific times, disable the day and night link and set the start and end manually.
- Add extra slots if needed and check any overlap warnings.
PPFD
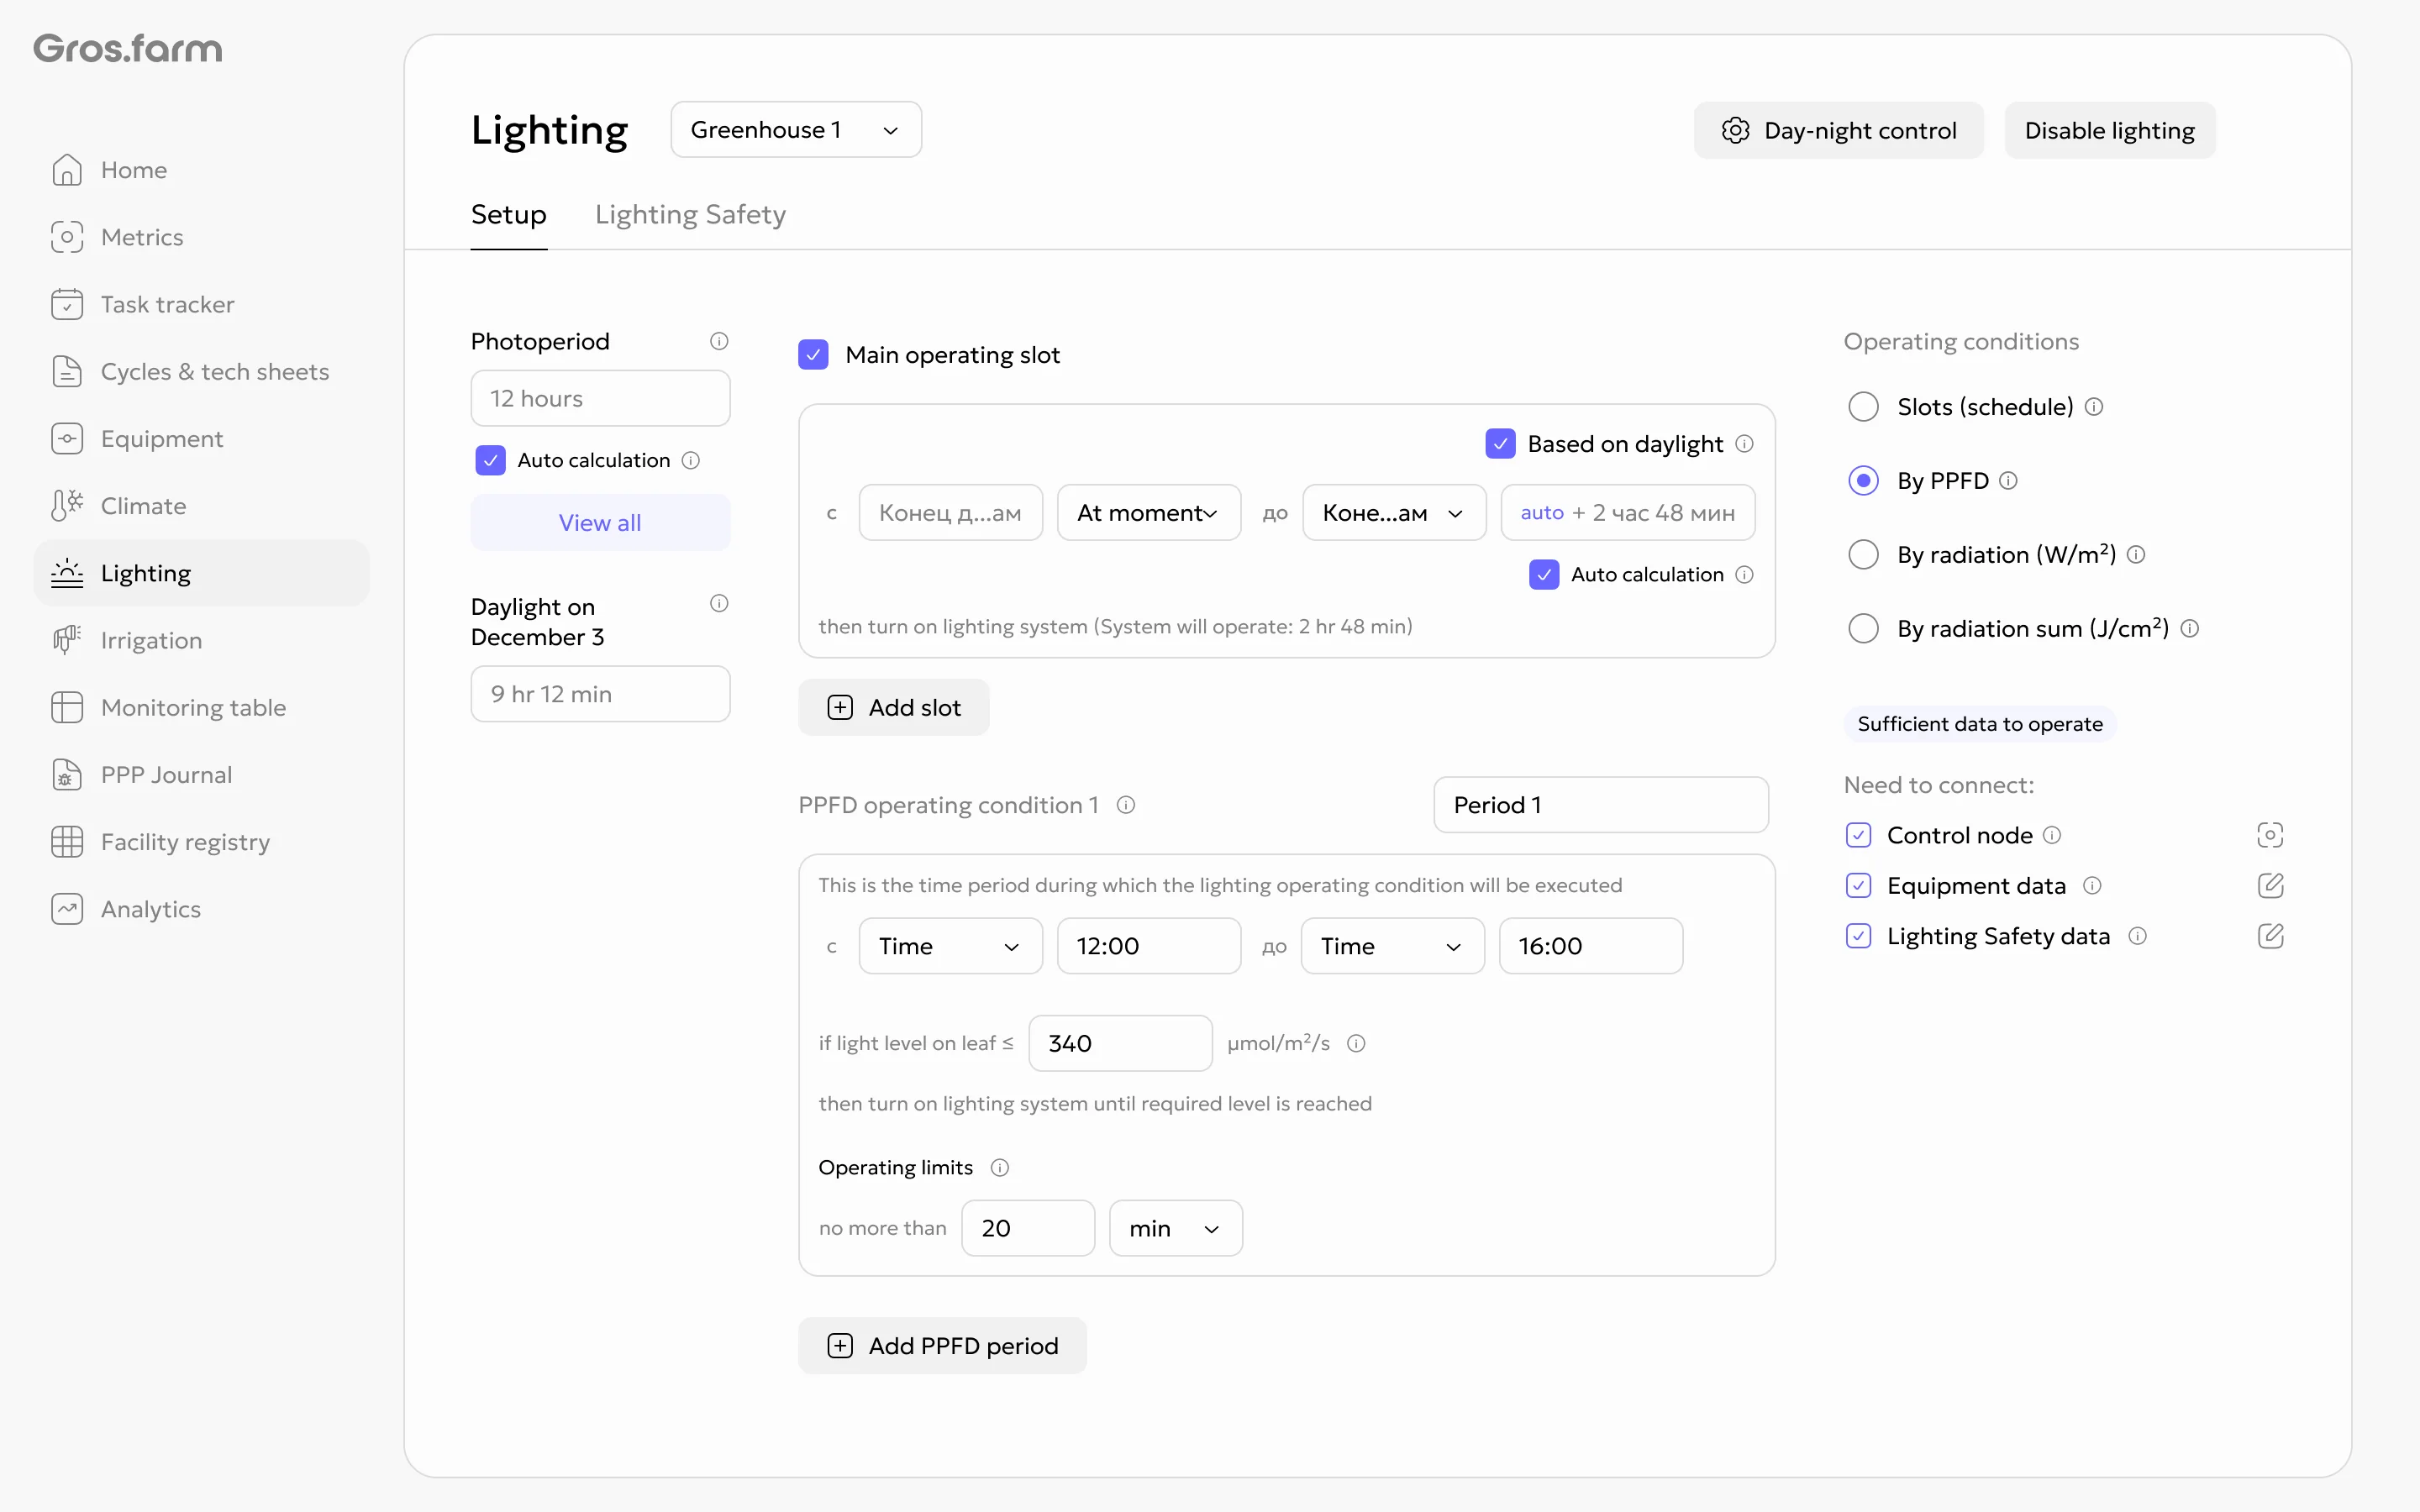
- Select PPFD.
- Configure the main supplemental-lighting slot, or disable it if only daytime conditions are required.
- Add a daytime control period.
- Enter the PPFD threshold below which lighting should turn on.
- Set the repeat activation frequency limit.
Irradiance, W/m²
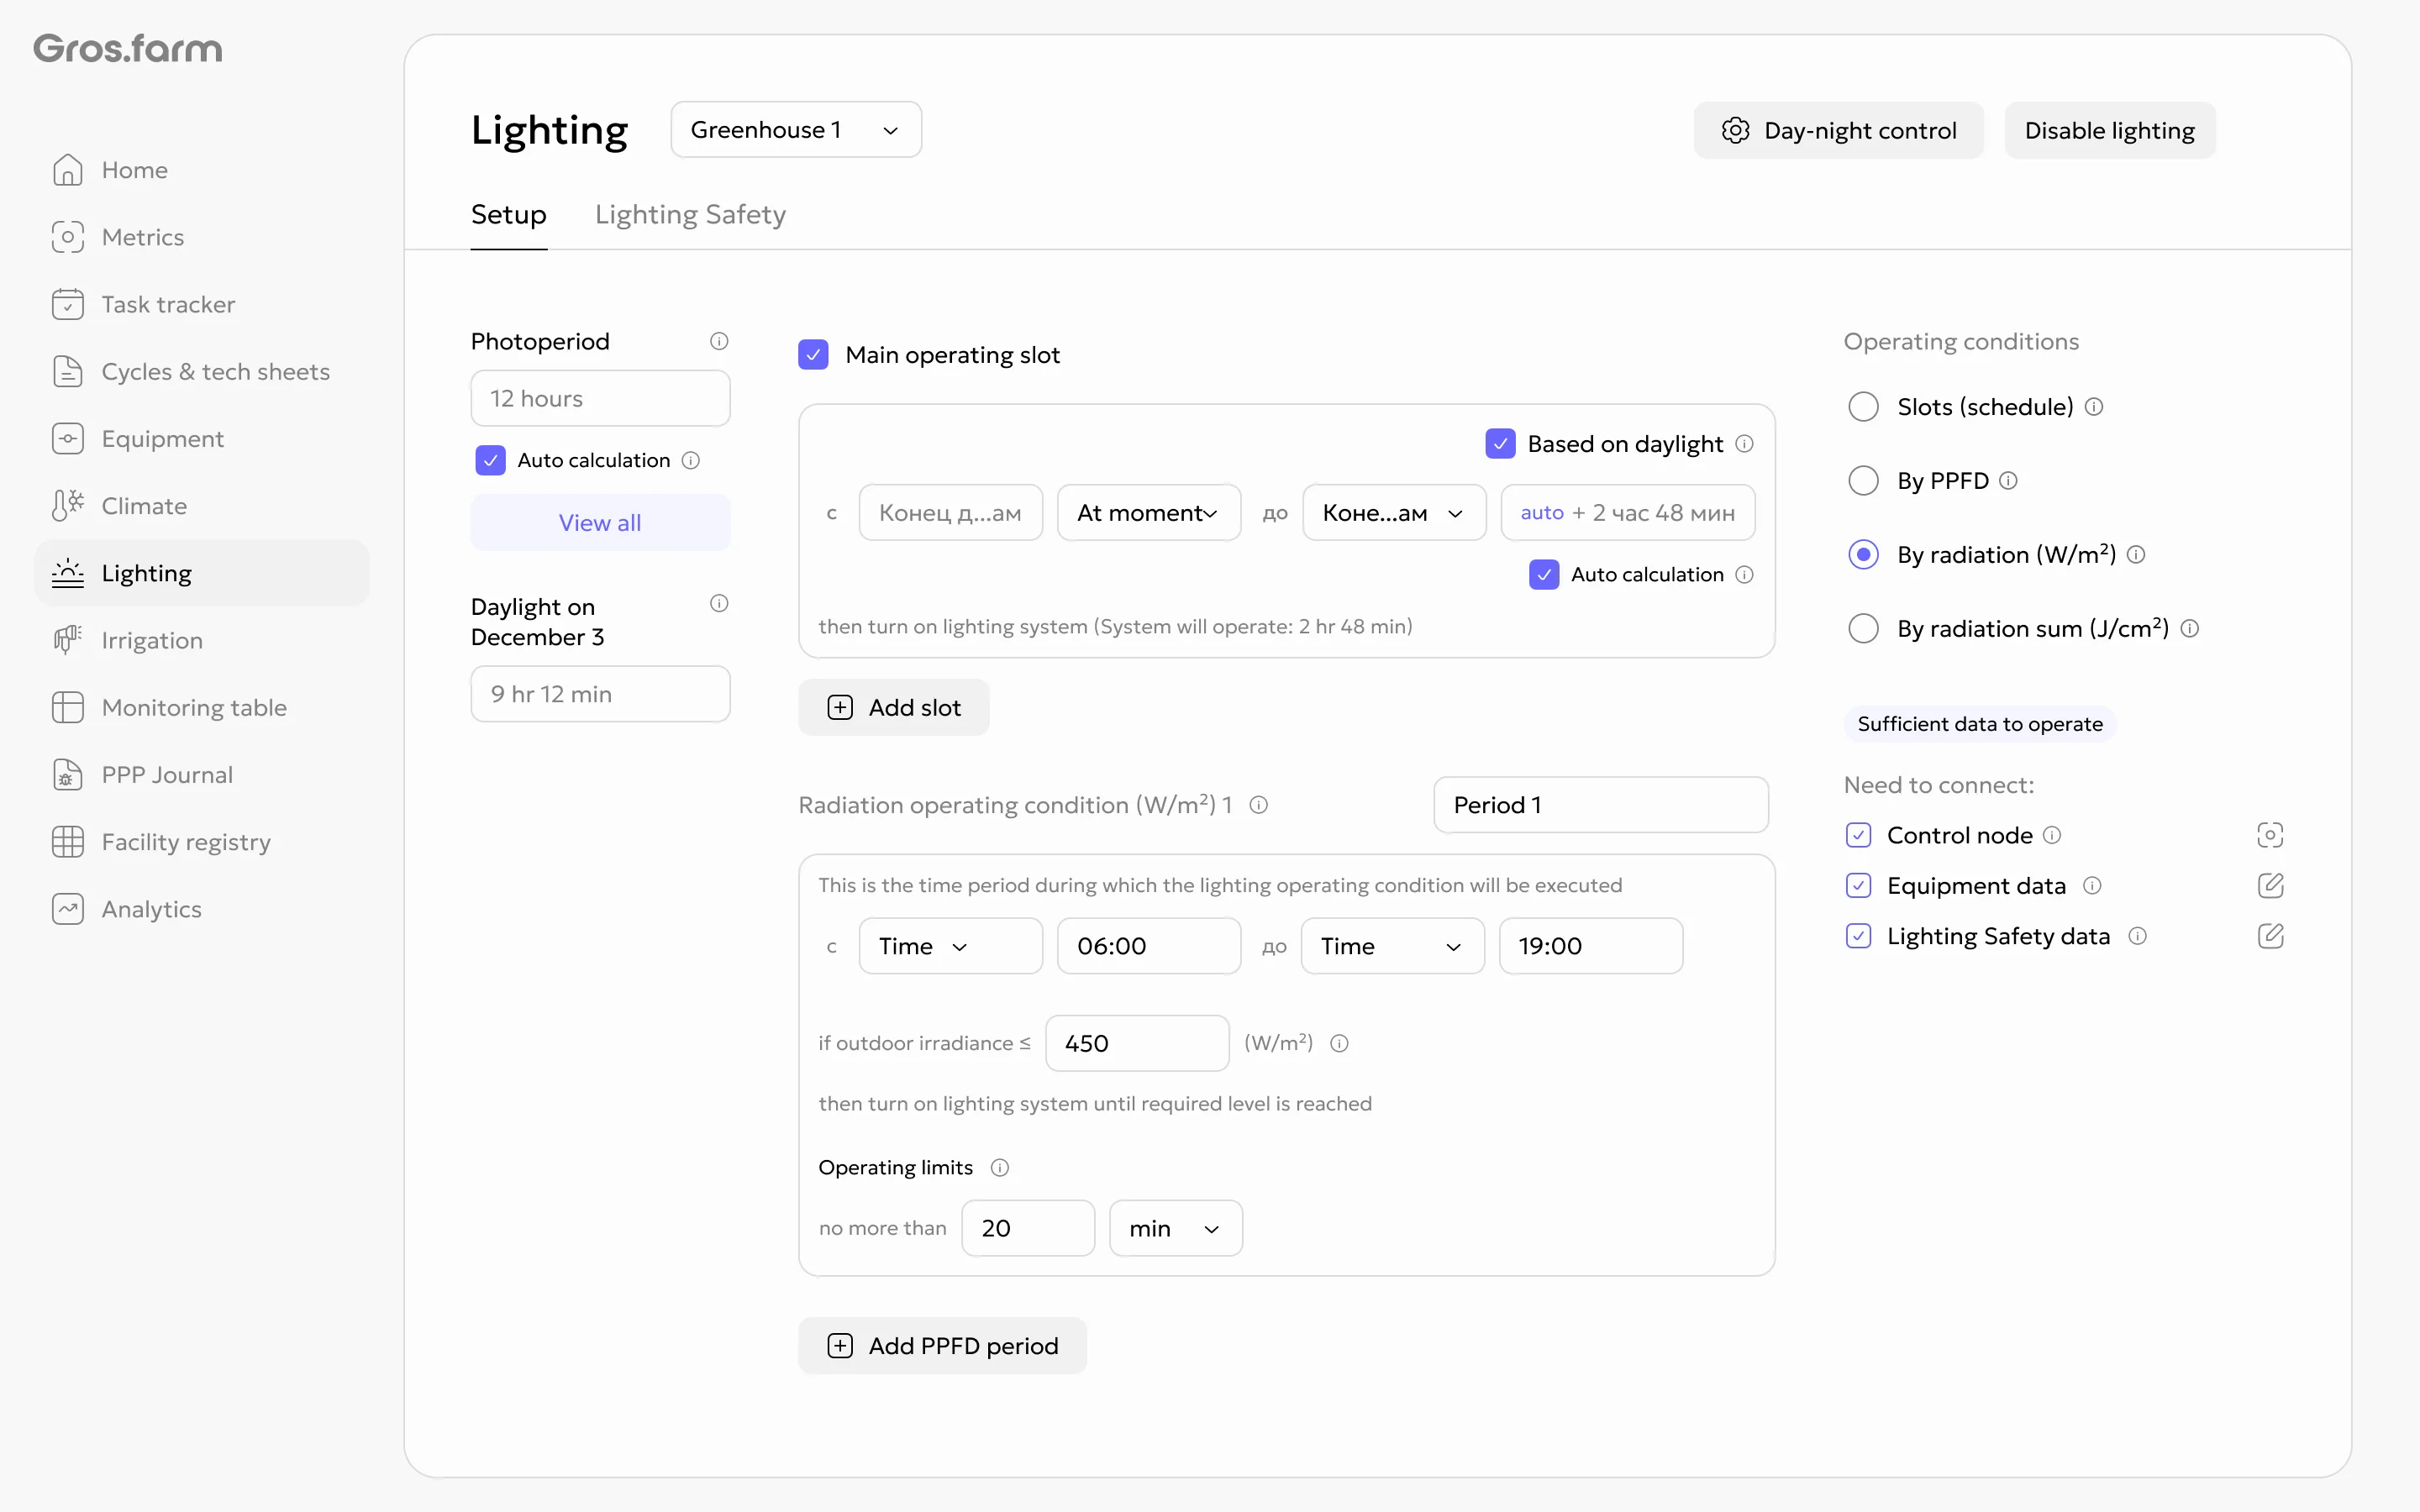
- Select Irradiance, W/m².
- Configure the main supplemental-lighting slot, or disable it if only daytime conditions are required.
- Add a daytime control period.
- Enter the irradiance threshold below which lighting should turn on.
- Set the repeat activation frequency limit.
Radiation sum, J/cm²
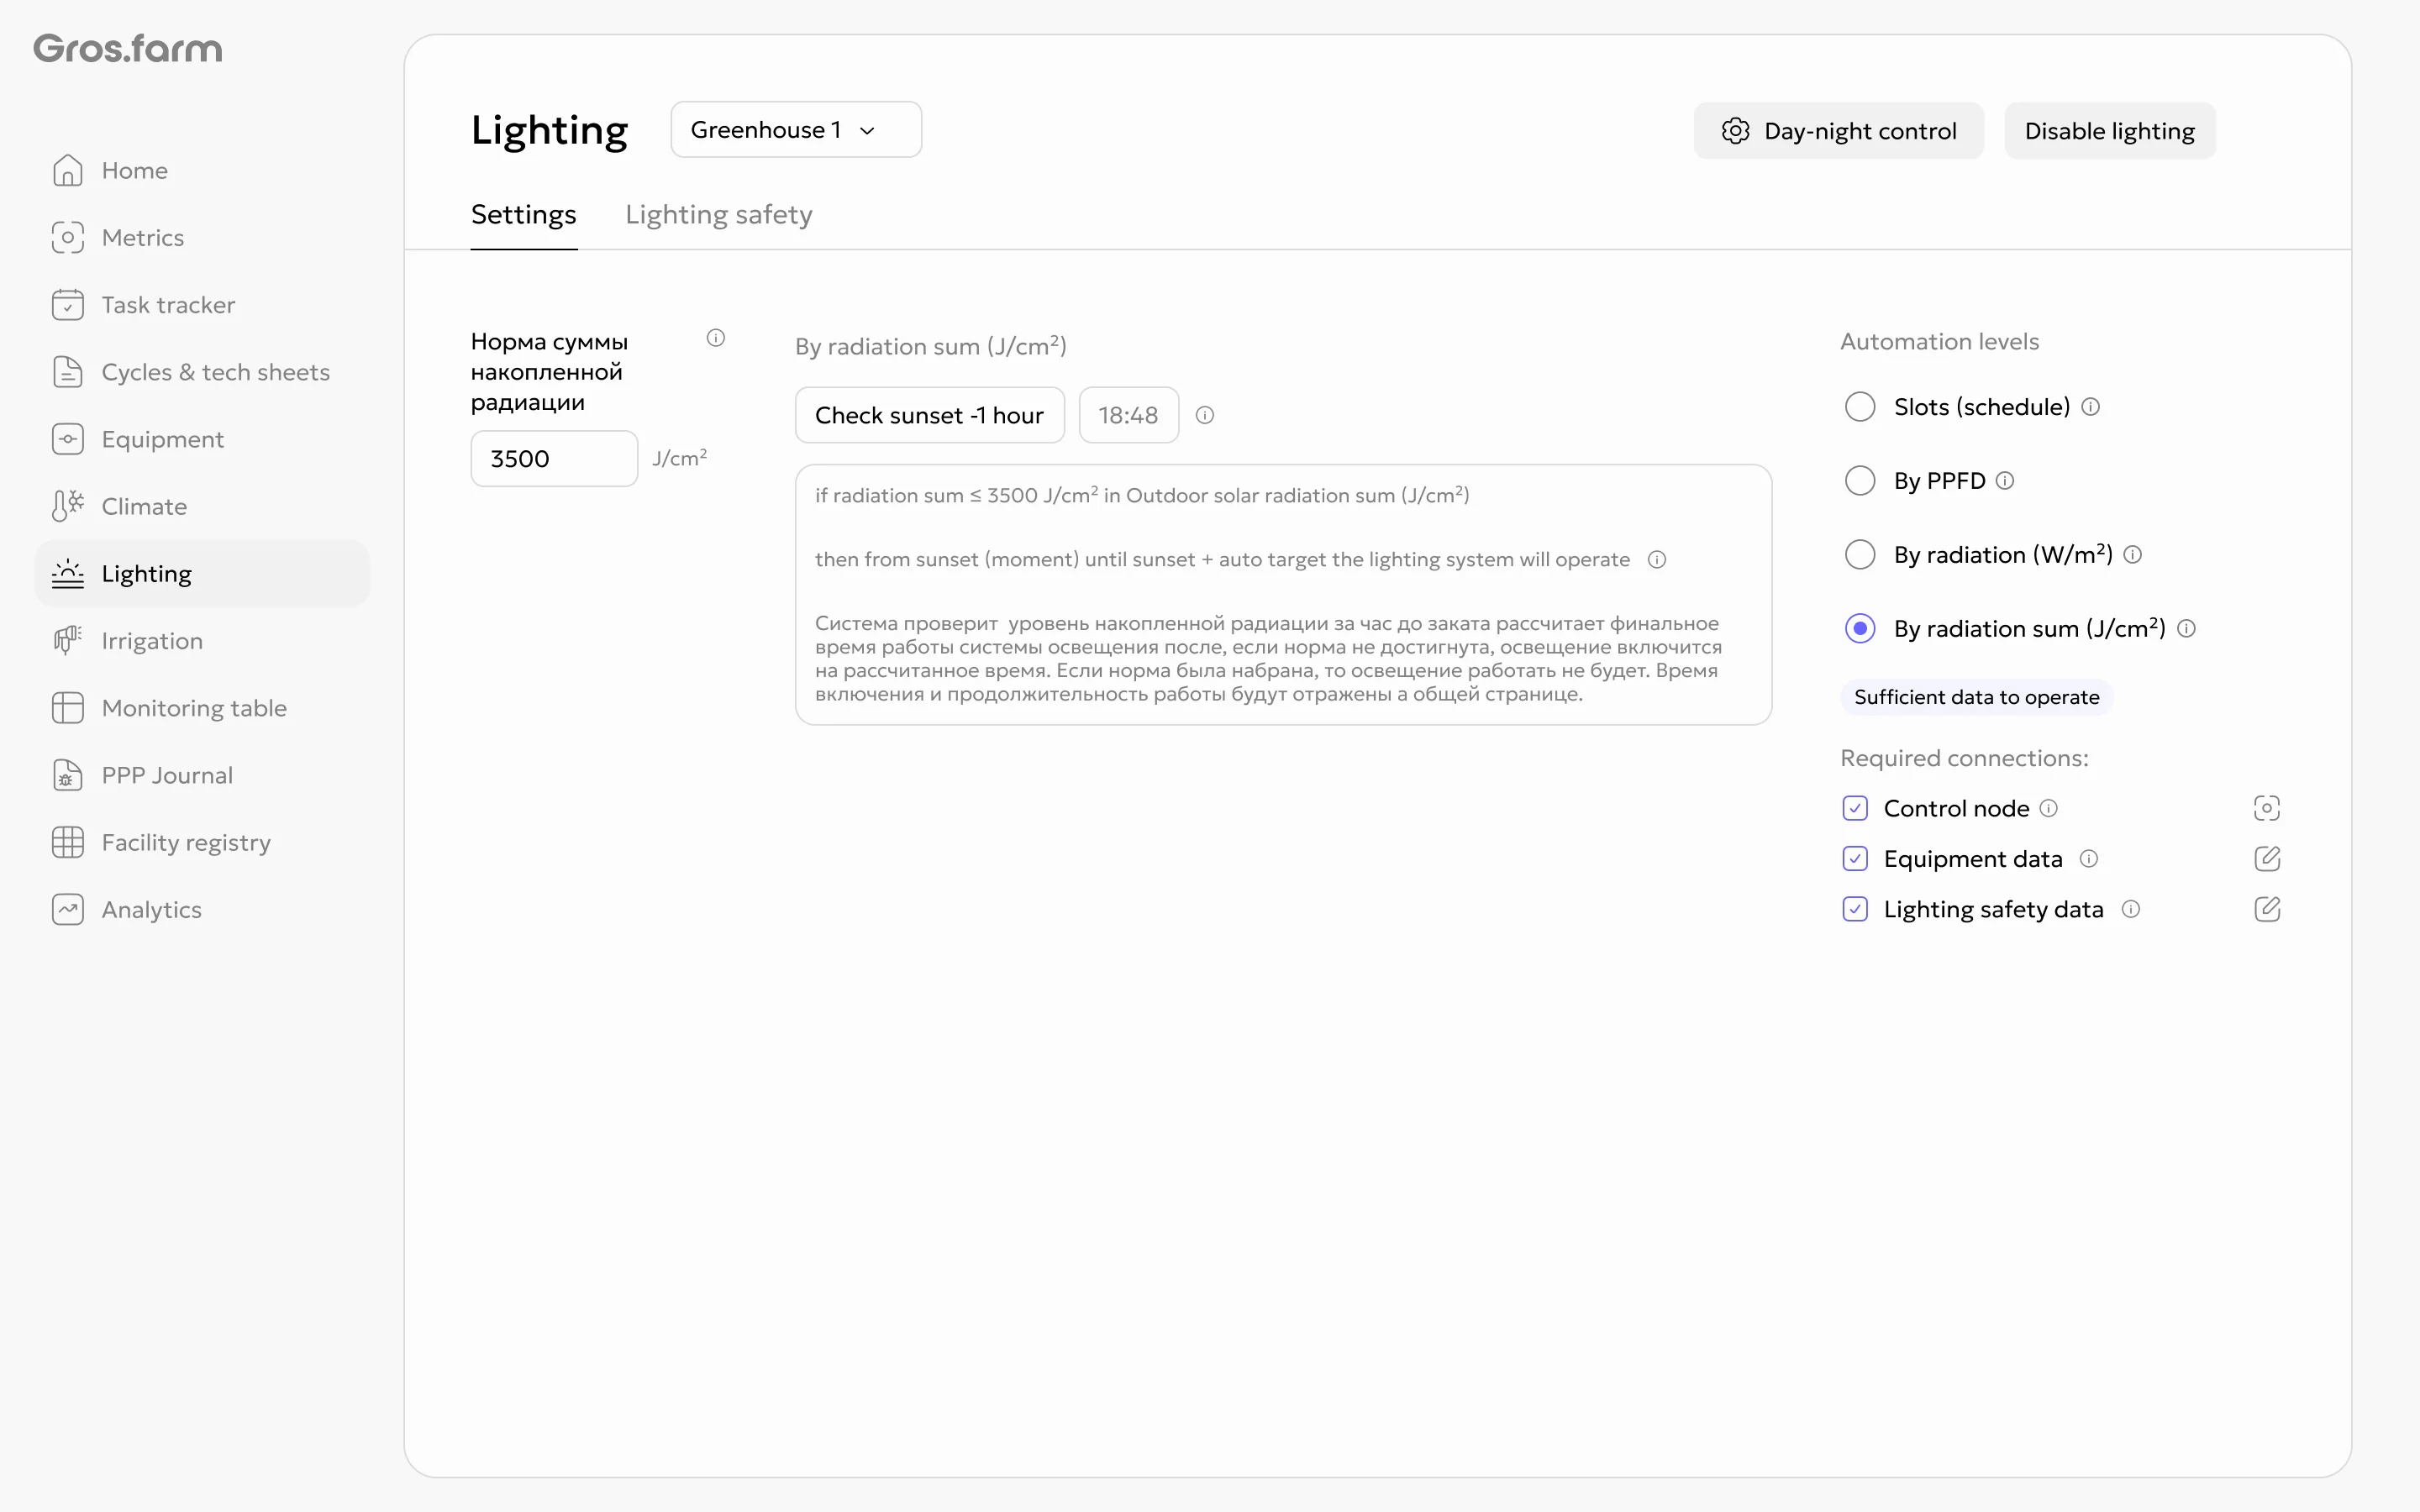
- Select Radiation sum, J/cm².
- Enter the daily target manually. This required field is not filled from a tech sheet automatically.
- Check the current accumulated value and the data used in the calculation.
- Check the calculated supplemental-lighting duration after the interim and final deficit recalculations.
- Make sure the luminaire parameters and illuminated area are correct.
5. Configure Safety
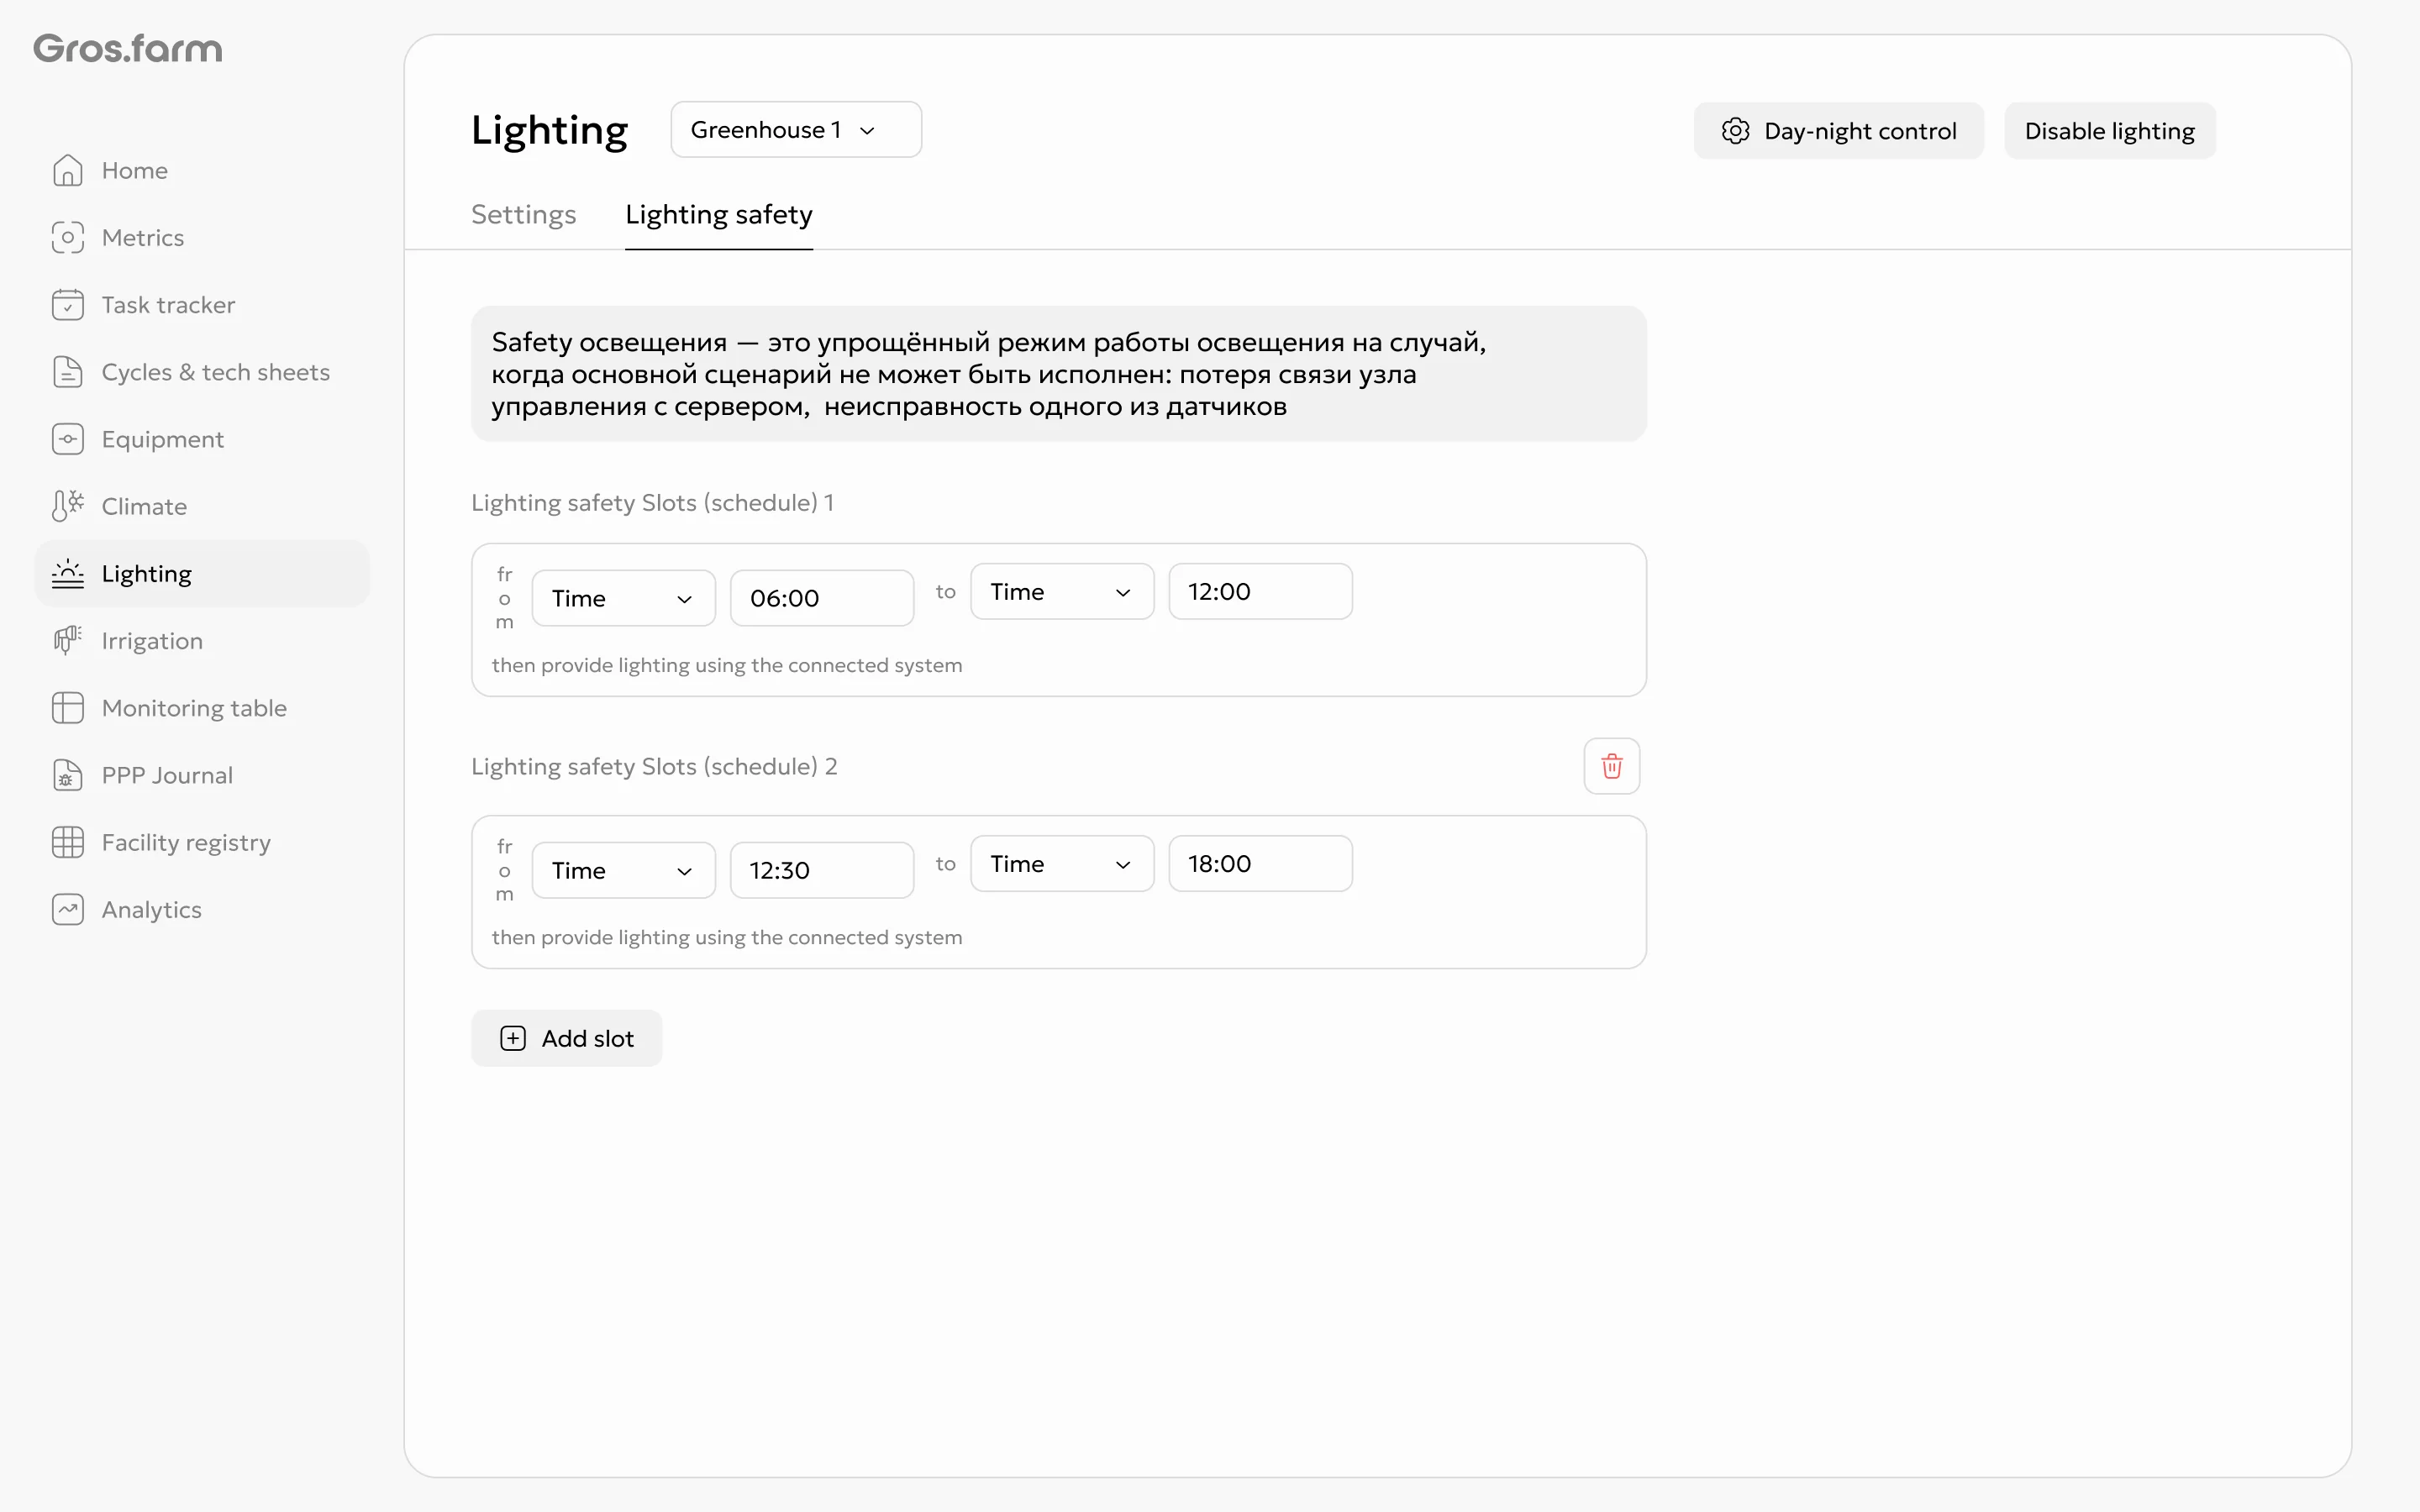
- Open the Safety tab.
- Add a safe lighting period.
- Set its start and end as exact times or relative to day, night, sunrise, or sunset.
- Add multiple Safety periods if needed.
- Check that the required Safety checkpoint is complete.
Safety is transferred to the local node in advance as a backup schedule. If communication is lost, the node completes the received operating plan and switches to Safety without sensor-based conditions.
6. Apply and verify the configuration
- Check the selected mode, slots, conditions, and Safety.
- Apply the configuration.
- Make sure the page shows the active configuration, node status, and current readings from the selected source.
- After changing equipment, the data source, or day and night settings, check the calculations and Safety again.
For more information about the modes and the local automation boundary, see Lighting.